Architecture
Onboarding and Purchase Flow
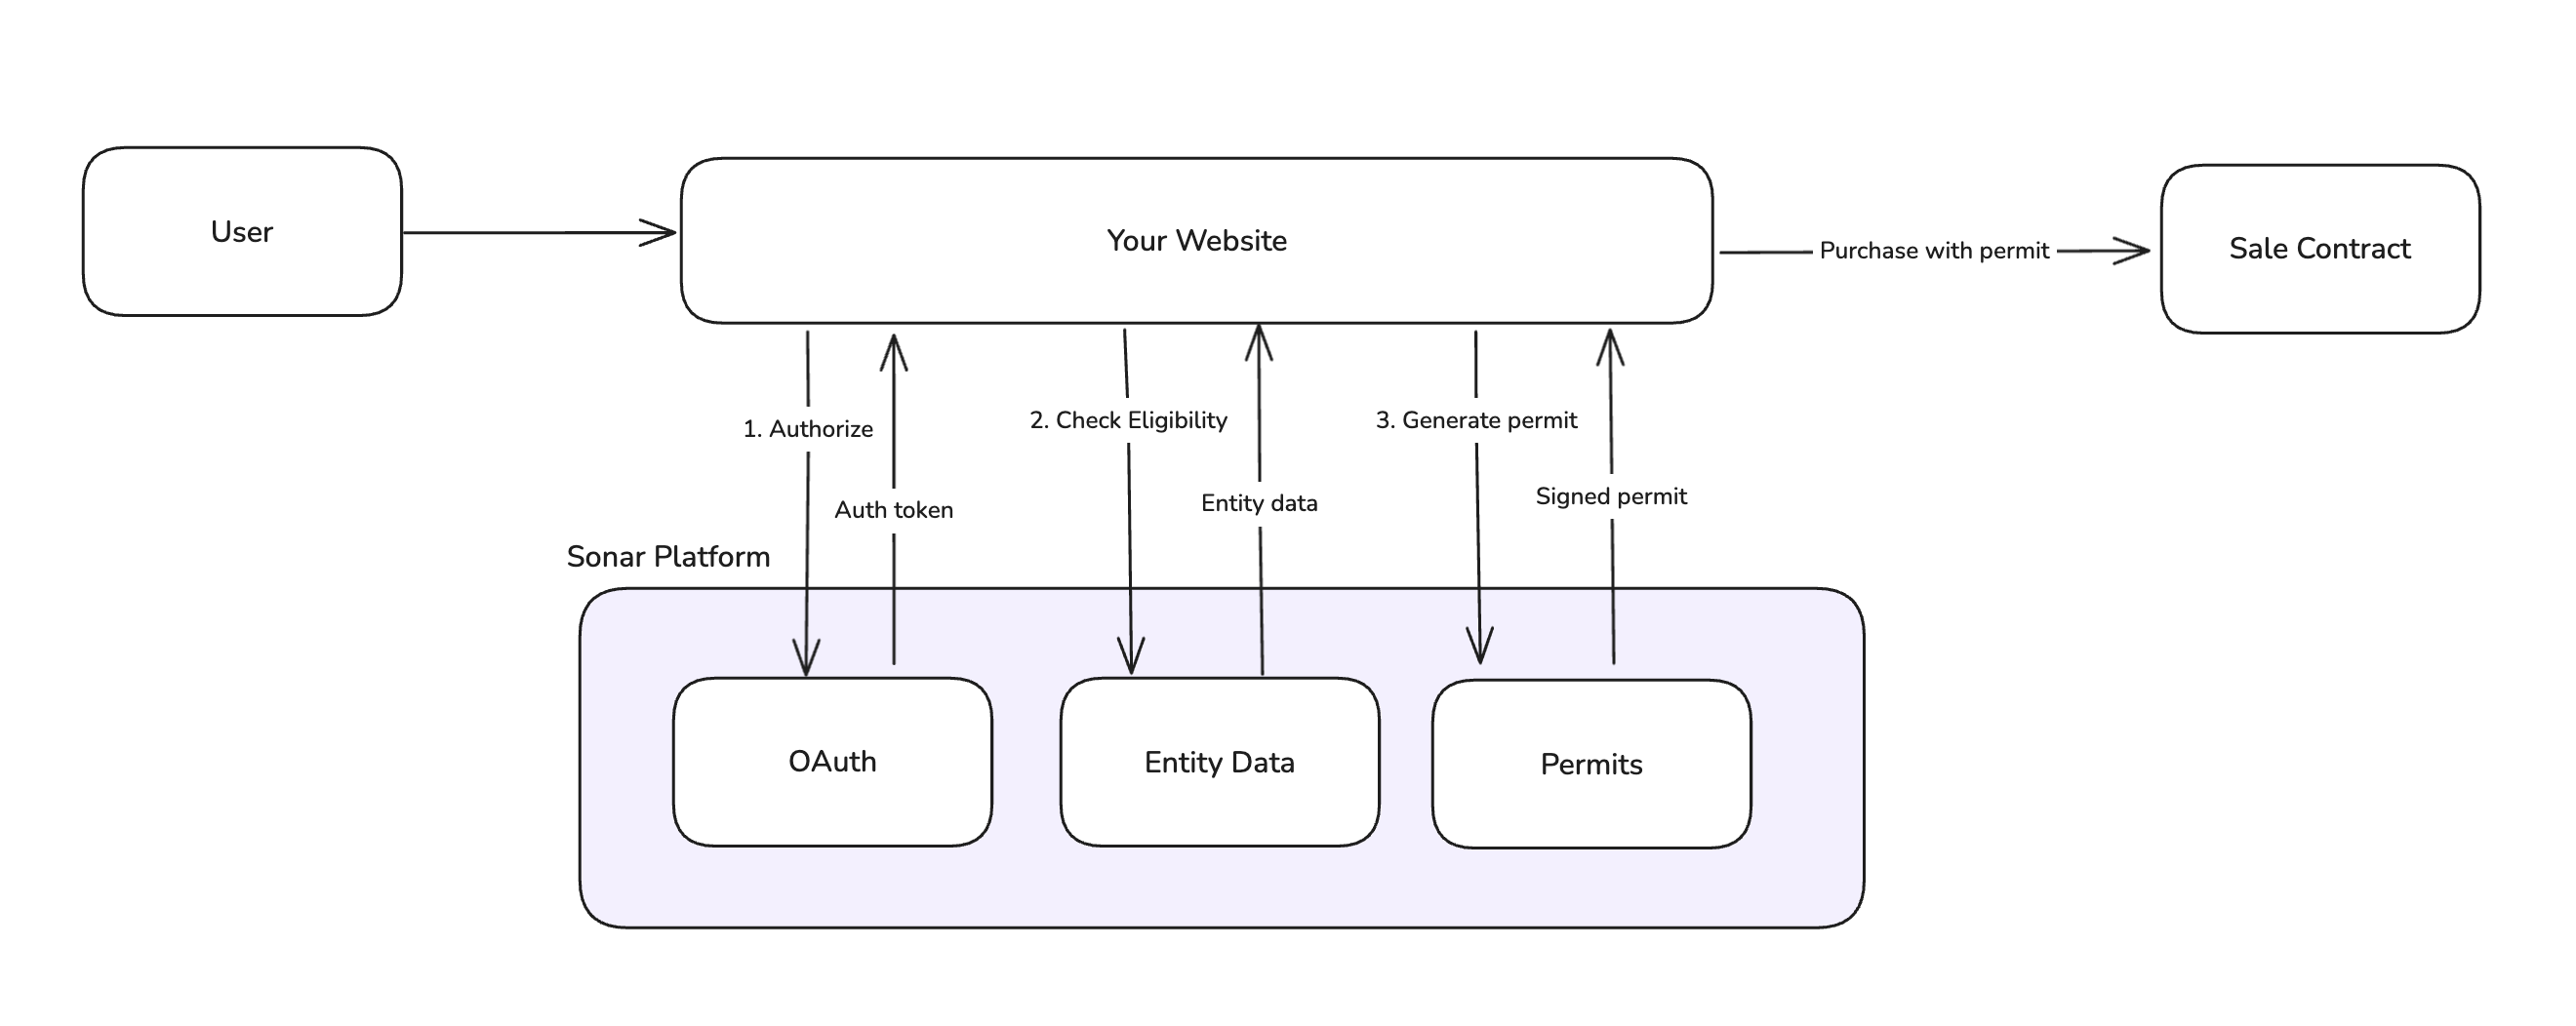
This is the end-to-end flow for a user participating in a token sale.1. User Arrives at Sale Page
The user lands on your sale page. Display sale information (timing, pricing, terms) and prompt them to connect.2. Connect Wallet and Sign In with Sonar
The user connects their wallet and authenticates with Sonar via OAuth. These can happen in either order.- Wallet connection: Use a standard wallet library (wagmi, ethers, etc.)
- Sonar authentication: OAuth 2.0 PKCE flow redirects to Sonar, then back to your site
3. Check Entity Status
Once authenticated, your application queries Sonar’s API to check:- Which entities are linked to the authenticated user
- Whether each entity’s
EntitySetupStateiscomplete
4. Complete Onboarding on Sonar
Users complete their verification on the Sonar platform. This includes:- KYC (individuals) or KYB (organizations) verification
- Accreditation verification (if required by the sale)
5. Verify Eligibility
With onboarding complete, check that the entity meets this sale’s specific requirements (jurisdiction, accreditation level, etc.). The entity’s eligibility status is returned when you fetch entity state. If not eligible, display a message explaining they don’t meet the sale requirements. See Sale-Specific Eligibility for details on each state, and the frontend integration guide for implementation examples. If the entity is eligible, run a pre-purchase check before generating a permit. This validates that the entity is ready to purchase (e.g. checking if a liveness verification is required).6. Commit Funds
When the user is ready to purchase:- Generate a purchase permit from Sonar’s API. The permit is a signed authorization containing purchase limits, price bounds, and expiration.
- Submit the transaction to the sale contract with the permit and signature. See the SettlementSale contract for a reference to our standard sale contract.
- Contract validates the permit signature and records the commitment.
Next steps
Frontend Integration Guides
Get started with code examples for different frontend architectures